iPhone Cinematography Tips: Mastering Framing, Composition, and Camera Movement
With the advancements in technology, it’s easier than ever to capture high-quality footage using just your iPhone. Filmmakers and video enthusiasts alike are turning to their smartphones as a tool for creating cinematic content. However, shooting on an iPhone requires a different approach than using a traditional camera. To achieve professional-looking results, it’s essential to understand the art of cinematography and how to apply it specifically to iPhone filmmaking.
In this article, we’ll dive deeper into the art of cinematography with specific tips on framing, composition, and camera movement using an iPhone. Whether you’re a beginner or an experienced filmmaker, these tips will help you take your iPhone cinematography to the next level. We’ll cover everything from basic principles of composition to advanced techniques for creating dynamic shots. With these tips, you’ll be able to create stunning footage that rivals that of professional cameras.
By learning the art of cinematography and applying it to your iPhone filmmaking, you’ll be able to create beautiful and engaging content that captures your audience’s attention. Whether you’re shooting a short film, a vlog, or a promotional video, these tips will help you elevate your work and stand out from the crowd. So, grab your iPhone and let’s get started!
Understanding iPhone Cinematography
When it comes to shooting cinematic videos with an iPhone, there are a few key things to keep in mind. Here are some tips to help you understand the basics of iPhone cinematography:
Framing and Composition
Framing and composition are crucial aspects of cinematography. When shooting with an iPhone, it’s important to pay attention to the placement and position of your subject in the frame. You can use the rule of thirds to help you frame your shots, which involves dividing the frame into thirds both horizontally and vertically and placing your subject at one of the intersections.
You can also experiment with different angles and perspectives to add visual interest to your shots. For example, shooting from a low angle can make your subject appear more powerful or dominant, while shooting from a high angle can make them appear smaller or more vulnerable.
Camera Movement
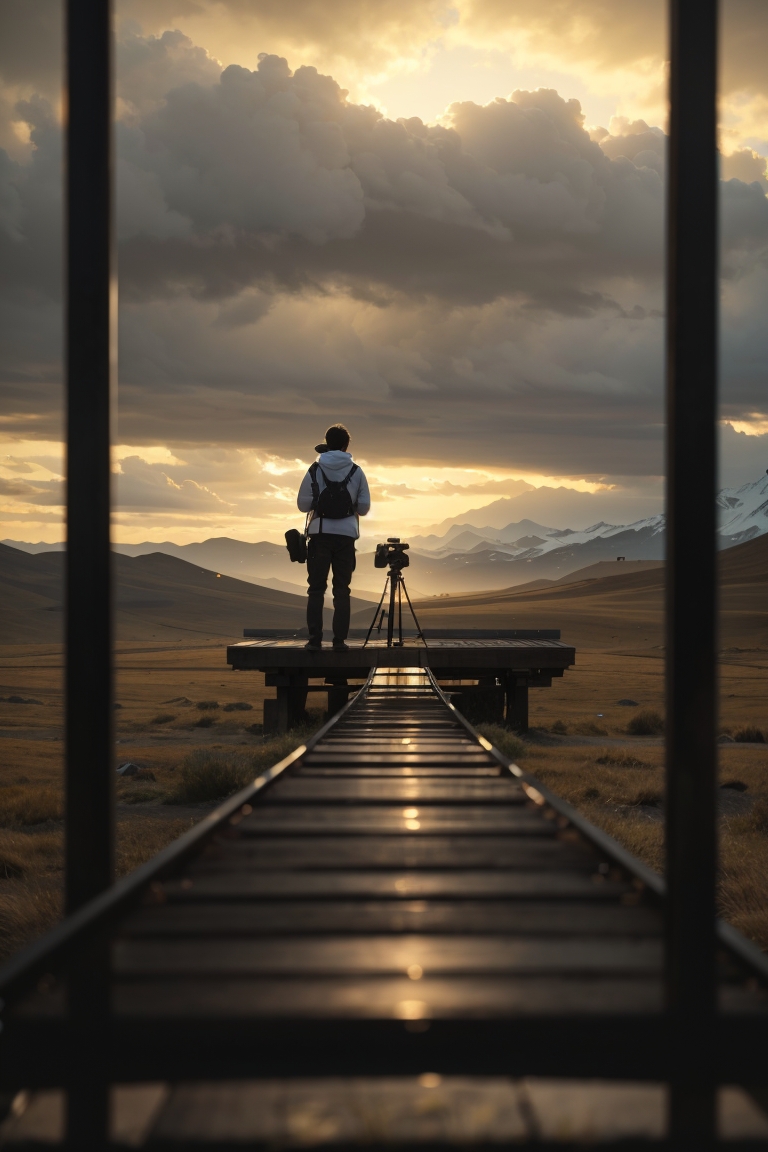
Camera movement can add a lot of visual interest to your videos, but it’s important to use it sparingly and purposefully. When shooting with an iPhone, you can use a variety of techniques to add movement to your shots, such as panning, tilting, and tracking.
It’s important to keep your movements smooth and steady, as shaky footage can be distracting and take away from the overall quality of your video. You can use a tripod or stabilizer to help keep your shots steady, or simply practice holding your iPhone with a steady hand.
Lighting
Lighting is another crucial aspect of cinematography. When shooting with an iPhone, it’s important to pay attention to the lighting conditions in your environment and adjust accordingly. You can use natural light or artificial light sources to create different moods and effects in your shots.
It’s also important to avoid harsh shadows and overexposure, which can make your footage look unprofessional. You can use the iPhone’s exposure and focus controls to adjust the brightness and focus of your shots, or use external lighting sources to create more controlled lighting conditions.
Overall, iPhone cinematography requires a combination of technical skill, creativity, and attention to detail. By paying attention to framing, composition, camera movement, and lighting, you can create cinematic videos that are both visually stunning and engaging.
Framing Techniques with iPhone
Framing is one of the most important aspects of cinematography, and it’s no different when it comes to iPhone cinematography. Here are a few framing techniques to consider when shooting with an iPhone:
Rule of Thirds
The rule of thirds is a basic principle of photography and cinematography. The idea is to divide the frame into thirds both horizontally and vertically, and then place the subject or point of interest at one of the intersections. This creates a more visually appealing and balanced composition. Most iPhone cameras have a grid feature that can be turned on to help with this technique.
Leading Lines
Leading lines are lines within the frame that draw the viewer’s eye towards the subject. This can be a road, a fence, or any other line that leads towards the subject. Using leading lines can help create depth and guide the viewer’s attention to where you want it to go.
Symmetry
Symmetry is when the frame is divided into two equal halves, with the subject or point of interest in the center. This creates a sense of balance and can be very visually pleasing. However, it’s important to note that this technique should be used sparingly, as it can become repetitive and boring if overused.
Negative Space
Negative space is the area around the subject that is left empty. This can create a sense of isolation or loneliness, and can be used to draw attention to the subject. Using negative space can also create a more minimalist and clean composition.
Low Angle and High Angle
Changing the angle of the camera can completely change the feeling of the shot. Shooting from a low angle can make the subject appear more powerful or dominant, while shooting from a high angle can make the subject appear weaker or smaller. Experimenting with different angles can help create a more dynamic and interesting composition.
These are just a few framing techniques to consider when shooting with an iPhone. By experimenting with different techniques and finding what works best for the shot, you can create visually stunning and captivating compositions.
Composition in iPhone Cinematography
When it comes to iPhone cinematography, composition is a crucial element that can make or break a shot. The way a shot is framed can greatly impact the audience’s emotional response and understanding of the scene. Here are some tips for composition in iPhone cinematography:
Rule of Thirds
One of the most basic rules of composition is the rule of thirds. This rule involves dividing the frame into thirds both horizontally and vertically, resulting in nine equal parts. The points where the lines intersect are called “power points,” and placing important elements of the shot at these points can create a more visually pleasing and balanced composition.
Positive and Negative Space
Another important element of composition is positive and negative space. Positive space refers to the main subject or object in the shot, while negative space is the area around it. Using negative space effectively can create a sense of balance and harmony in the shot, while too much negative space can make the shot feel empty or unbalanced.
Movement
Camera movement can also greatly impact the composition of a shot. Panning or tilting the camera can create a sense of movement and lead the audience’s eye to different parts of the shot. However, it’s important to use camera movement intentionally and not overdo it, as too much movement can be distracting and take away from the main subject of the shot.
Fill the Frame
Filling the frame with the main subject or object can create a sense of intimacy and intensity in the shot. This technique can be particularly effective in close-up shots, where the subject’s emotions and facial expressions are the main focus.
Simplify
Finally, simplifying the composition of a shot can often be more effective than trying to include too many elements. Removing unnecessary objects or elements from the shot can create a more focused and impactful composition, drawing the audience’s attention to the main subject or object.
By using these composition techniques in iPhone cinematography, filmmakers can create more visually appealing and emotionally impactful shots.
Camera Movement Tips for iPhone
When it comes to cinematography, camera movement can make or break a shot. Here are some tips for achieving smooth camera movements with an iPhone:
- Use a stabilizer: A stabilizer can help to reduce shakiness and create smooth camera movements. There are many different stabilizers available for iPhones, ranging from handheld gimbals to tripod mounts.
- Experiment with different camera movements: There are many different camera movements to choose from, including pans, tilts, and tracking shots. Experiment with different movements to see what works best for your shot.
- Keep movements slow and steady: When moving the camera, it’s important to keep the movements slow and steady. This will help to prevent jerky movements and create a smoother shot.
- Use the iPhone’s built-in tools: The iPhone has a number of built-in tools that can help with camera movement, including the grid and level. The grid can help with framing, while the level can help to ensure that the camera is straight.
- Plan camera movements in advance: Before shooting, it’s important to plan out camera movements in advance. This will help to ensure that the movements are smooth and fit with the overall tone of the shot.
By following these camera movement tips, iPhone cinematographers can create smooth and professional-looking shots that are sure to impress.
Advanced iPhone Cinematography Tips
To take your iPhone cinematography to the next level, consider the following tips:
1. Utilize Manual Controls
While the iPhone’s automatic settings can produce great results, using manual controls can give you more creative control over your shots. For example, adjusting the exposure and focus manually can help you achieve a more cinematic look.
2. Experiment with Different Lenses
The iPhone’s built-in lens is great for everyday use, but using additional lenses can help you achieve different looks and perspectives. Wide-angle lenses can help you capture more of the scene, while telephoto lenses can provide a more intimate view.
3. Use Camera Movement Purposefully
Camera movement can add visual interest to your shots, but it should be used purposefully. A smooth pan or tilt can help guide the viewer’s eye, while a handheld shot can add a sense of energy and movement.
4. Pay Attention to Composition
Composition is key to creating visually compelling shots. Consider the rule of thirds, leading lines, and symmetry when framing your shots. Don’t be afraid to experiment with different angles and perspectives.
5. Edit Your Footage
Editing is an important part of the filmmaking process, and it can help you refine your shots and tell a more compelling story. Use editing software to trim your footage, add transitions, and adjust color and exposure.
By utilizing these advanced iPhone cinematography tips, you can take your filmmaking to the next level and create visually stunning content using just your iPhone.
Common Mistakes to Avoid
When it comes to iPhone cinematography, there are a few common mistakes that filmmakers should avoid to achieve the best results. Here are some tips to keep in mind:
1. Shaky Footage
One of the most common mistakes in iPhone cinematography is shaky footage. This can be caused by holding the phone too tightly, not using a stabilizer, or moving too much while filming. To avoid this, it’s important to keep the phone steady and use a stabilizer if possible. Additionally, filmmakers should try to move smoothly and avoid sudden jerky movements.
2. Poor Lighting
Lighting is crucial in cinematography, and it’s no different when filming with an iPhone. One of the most common mistakes is not having enough light or using the wrong type of light. Filmmakers should try to use natural light whenever possible and avoid harsh, artificial lighting. Additionally, they should be mindful of shadows and try to position the subject in a way that minimizes them.
3. Overusing Zoom
While it can be tempting to use the iPhone’s zoom feature, it’s important to use it sparingly. Digital zoom can result in a loss of quality and can make the footage look pixelated or blurry. Instead, filmmakers should try to get closer to the subject or use external lenses if necessary.
4. Forgetting about Sound
Sound is just as important as visuals in cinematography, but it’s often overlooked when filming with an iPhone. To avoid poor sound quality, filmmakers should use an external microphone if possible and be mindful of background noise. Additionally, they should try to capture ambient sound to add depth and realism to the footage.
By avoiding these common mistakes, filmmakers can achieve better results when filming with an iPhone. With a little practice and attention to detail, anyone can create cinematic footage using just a smartphone.
Conclusion
In conclusion, iPhone cinematography is a creative decision that can have both pros and cons. While it may not compare to the new ARRI Alexa in terms of quality, it can still serve the story of a film. The basic cinematography techniques such as framing, camera position, and movement can significantly impact how the audience interprets what’s happening in the scene.
With the right techniques and tools, anyone can achieve cinematic-looking footage using an iPhone. The tips mentioned in this article, such as using the rule of thirds, leading lines, and depth of field, can help elevate the quality of your footage. It is also important to pay attention to lighting, sound, and editing to ensure a polished final product.
Overall, iPhone cinematography is a growing trend in the film industry, and it is important to stay updated with the latest techniques and trends. As technology advances, it is becoming easier and more accessible for anyone to create professional-looking footage using just their smartphone. By following the tips outlined in this article and practicing regularly, anyone can improve their iPhone cinematography skills and create stunning visuals.